Download a free one and let the happiness begin.
Eclipse-based development tools like RDi are great, but certain features we're used to just don't seem to be there. The ability to edit a data area is one of them. There are many occasions when developing that access to a data area is a must. Typically, a 5250 session is started to perform this action. Now, with the ARCAD data area editor, that's a thing of the past.
The ARCAD data area editor is freeware. Finding and installing the plug-in is fast and easy. Navigate to the www.arcadsoftware.com page, click on the menu option for Resource center, and then select Freeware. You need to provide some contact information, like a name and an email address, but that's pretty standard with freeware like this.
The data area editor plug-in supports editing of character, decimal, and logical data areas. You can edit a data area that belongs to an "iProject," or you can edit directly from the Remote System Explorer perspective. There are some very useful features for editing a character data area. They include overwrite/insert mode, fixed-size line editing, and search and replace functions.
Preparing to Install the Plug-in
Download the files needed from the ARCAD site as described above. This document will describe unzipping the file for installation; however, newer versions of Eclipse can use the zip file directly.
Once the file is downloaded, create a folder on your computer called Local Site Folder. Unzip the contents of the download into this folder. You should see the following:
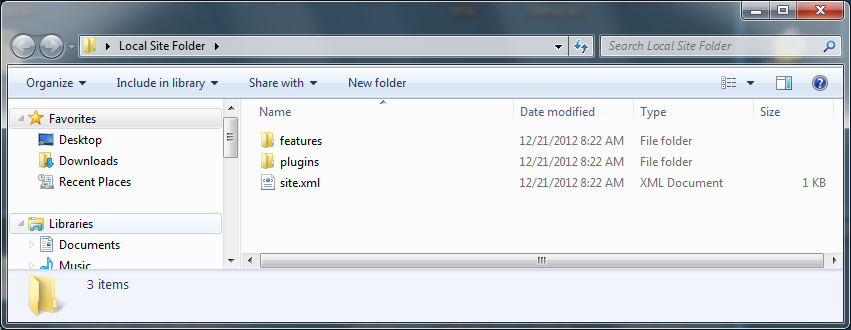
Figure 1: These are the contents of the ARCAD plug-in folder.
You're now ready install. In today's example, we'll use RDi. The version of RDi must be 8.5.x or greater to use this plug-in. Note that this plug-in requires the use of the Remote System Explorer perspective, so it will not function in just any Eclipse-based product; this is a Rational plug-in.
Installing the Plug-ins
Select the Install New Software command in the Help menu.
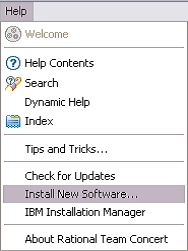
Figure 2: Select the Install New Software option.
Once the Install dialog starts, click Add.
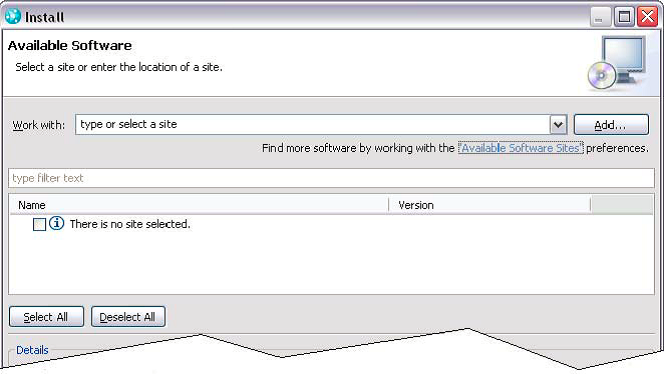
Figure 3: Add a local site.
On the Available Software Sites preference page, click Add.
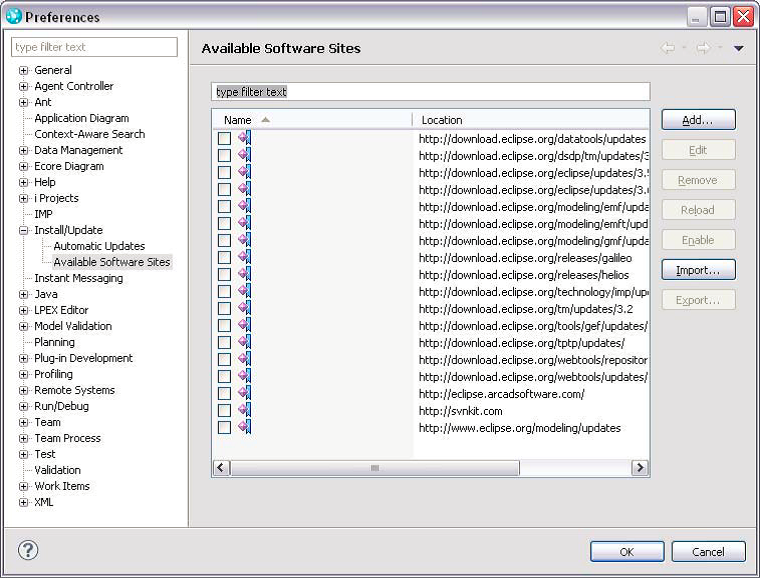
Figure 4: Click on Add to add a site.
On the Add Site dialog, enter a name and then click Local.
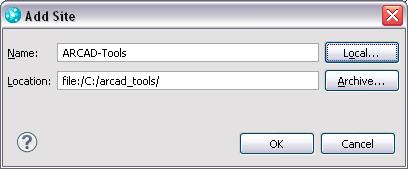
Figure 5: Click on Local.
Select the Local Site Folder created during the Preparing installation stage and click OK. The new local site now appears in the list. Select it if it is not yet selected. Click OK to return to the Install dialog, In the Work With drop-down list of the Install dialog, select the newly added site.
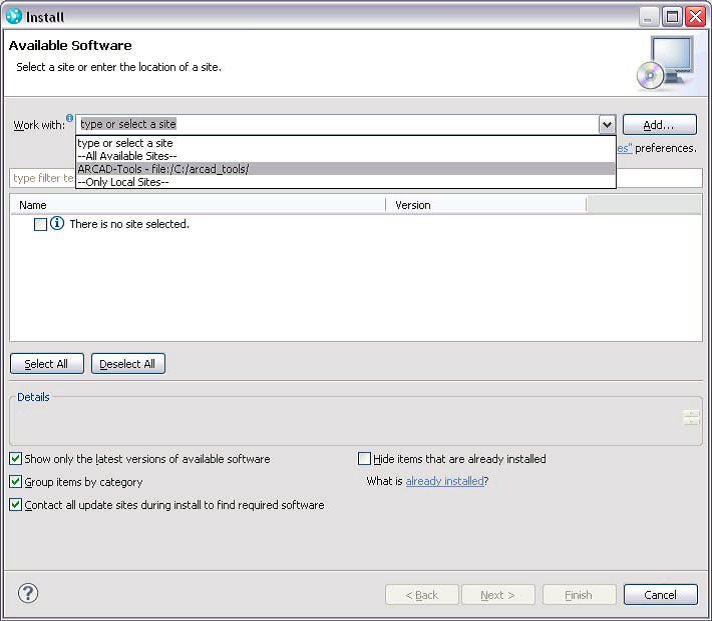
Figure 6: Select the local site.
The list now shows the ARCAD plug-ins to install.
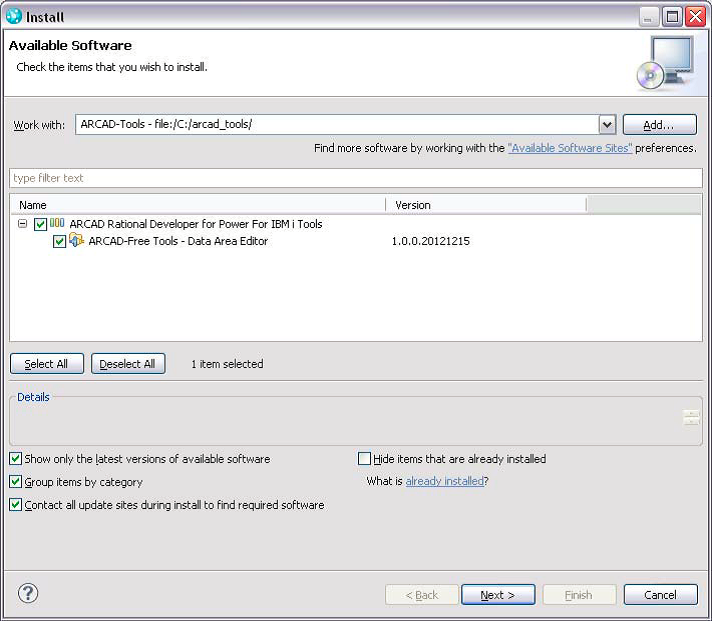
Figure 7: The plug-ins are now in Available Software.
Ensure that all are checked as shown and click on Next to continue. On the Install Details page, review the selected features.
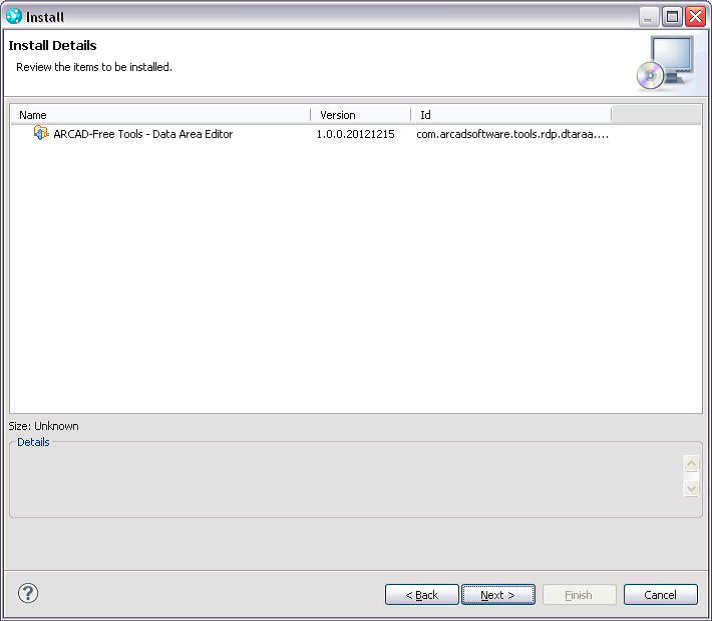
Figure 8: Install Details shows the Data Area Editor.
The rest of the install is basically accepting terms and following along with the install wizard. Once the process is complete, the ARCAD data area editor is ready to use.
Using the Data Area Editor
Once the plug-in is installed, you can edit a data area from the Remote System Explorer view or the iProject Navigator view. To edit from Remote System Explorer, open a filter that contains data area objects, right-click on the data area you want to edit, and in the menu that appears select ARCAD-Tools and then Edit Data Area. This will open the editor and allow you to alter the contents of the data area.
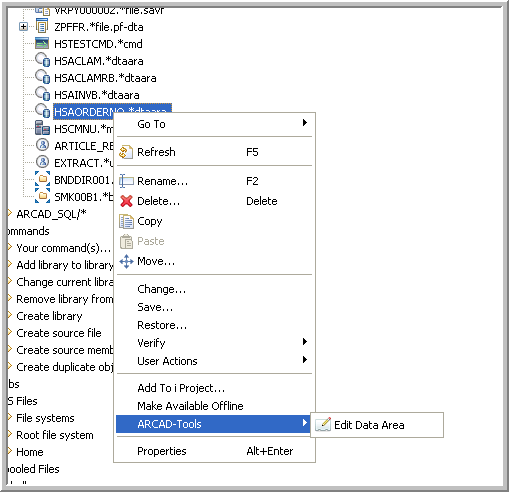
Figure 9: Find the plug-in.
From the iProject Navigator view, browse your iProject for data areas and right-click. The process is the same. Online help for using the editor can be found on the Help menu.
ARCAD Software's data area editor, while simple, provides a solution to editing a data area while staying within the Eclipse platform. ARCAD offers other freeware for Eclipse that can be found on their page at www.arcadsoftware.com. Click on Resource Center and then Downloads.


 Business users want new applications now. Market and regulatory pressures require faster application updates and delivery into production. Your IBM i developers may be approaching retirement, and you see no sure way to fill their positions with experienced developers. In addition, you may be caught between maintaining your existing applications and the uncertainty of moving to something new.
 IT managers hoping to find new IBM i talent are discovering that the pool of experienced RPG programmers and operators or administrators with intimate knowledge of the operating system and the applications that run on it is small. This begs the question: How will you manage the platform that supports such a big part of your business? This guide offers strategies and software suggestions to help you plan IT staffing and resources and smooth the transition after your AS/400 talent retires. Read on to learn:
LATEST COMMENTS
MC Press Online