Download a free 5250 emulator designed to help you work with IBM i objects within the Eclipse framework.
Are you using the new Eclipse framework alongside 5250 sessions to get the job done? Would a 5250 emulator that's available within the Eclipse framework make things easier for you?
For 5250 emulation, aka "green-screen" access, most shops use the product called iSeries Access. A developer working within an Eclipse-based IDE has no access to 5250 emulation within the Eclipse framework. Let's face it; we're still dealing with legacy code even though we're using these new development tools. The new tools make development easier, but they don't provide great access to legacy programs running on the System i. That's the issue this plug-in is designed to solve.
This article explains where to get the plug-in, how to install it, and how to use it.
5250 Emulation in Eclipse
The ARCAD 5250 Emulator allows you to start 5250 emulation sessions from within an Eclipse-based IDE. The plug-in requires no software to be installed on the System i and is compatible with any Eclipse-based product. Here's how it looks.
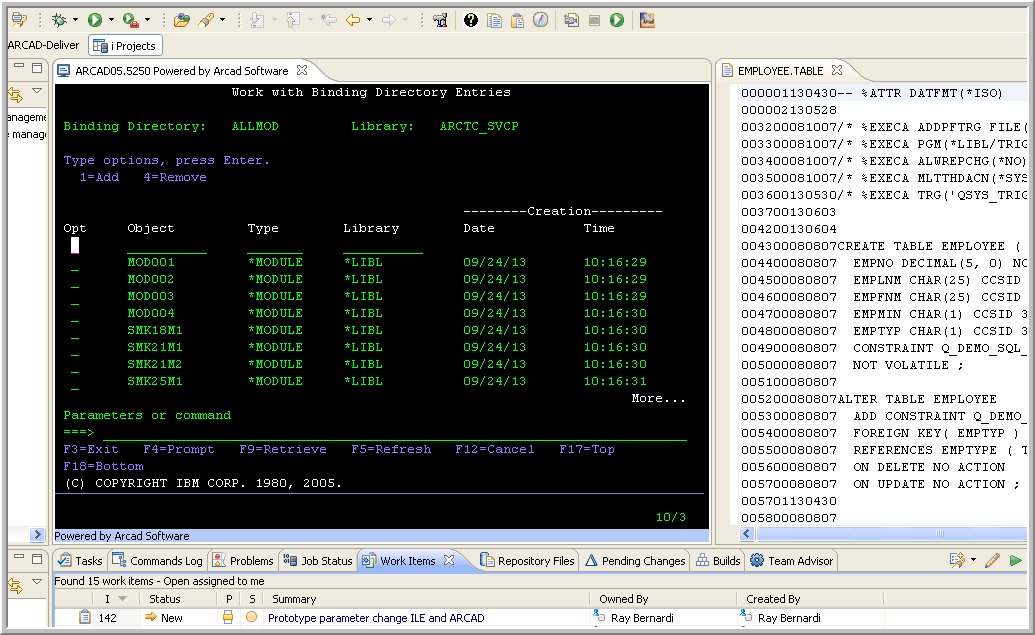
Figure 1: The Arcad 5250 Emulator is being used to edit a binding directory.
The emulator allows you to open any number of 5250 sessions on any number of machines. You can customize colors, typeface, cursor shape, and more. It supports 24x80 and 27x132, the code page, and system requests. It assigns 5250 functions to your keyboard, manages copy/paste, supports the hotkeys Ctrl+C and Ctrl+V, automatically resizes, and more. In the above example, the emulator is being used to edit a binding directory. This is a sample of a function that cannot be performed within RDi.
Getting the Plug-In
Finding the plug-in is simple. Navigate to the www.arcadsoftware.com page, click the menu option for Resource center, and then select Software Downloads. The process is fast and easy. You do need to provide some contact information, such as a name and an email address, but that's pretty standard with freeware like this.
The plug-in will be delivered as a zip file that you can expand and install within the Eclipse product you're using. With newer versions of Eclipse, there's no need to expand the zip file; it can be used directly. For this article, I'll be using RDi as my Eclipse product. The installation routine may differ slightly in other products.
I have unzipped the emulator and placed it in a folder on my desktop. To begin the installation, I click Help > Install New Software. Then, I click Add and enter a new local site and select the folder I just unzipped. You should also uncheck the box labeled "Group items by category" in order to see the software. Your screen will look something like this:
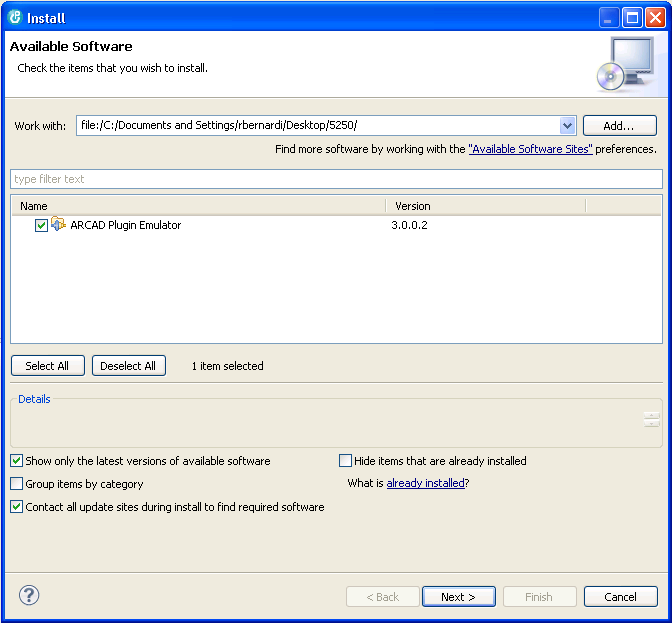
Figure 2: The Arcad 5250 Emulator plug-in is selected for install..
Click Next and follow the wizard through the install process. Once the software has completed installation, restart the workbench before continuing. There's a function available to apply changes now, and I have used it successfully in the past. You may be able to do the same. If you receive any errors, restart the workbench.
That's all there is to installing the plug-in; it's pretty simple. The next step is where people get a bit lost, so let's go through it here.
Using the Plug-In
The plug-in is installed, but there's no perspective or view available to find it, so what happened? Relax, it's OK, the plug-in uses an editor view to display the emulator, so you need to configure it. Let's see how that's done.
First, open the Remote Systems Explorer perspective by selecting Window > Open Perspective > Other > Remote System Explorer. Then you need to create a general project. Choose File > New > Project, expand the General node, and select Project. You'll need to provide a description like "5250 sessions" as shown in Figures 3 and 4:
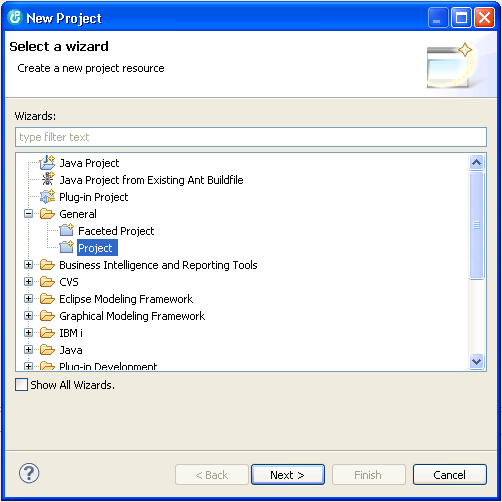
Figure 3: Create a new General Project to contain the Arcad 5250 Emulator..
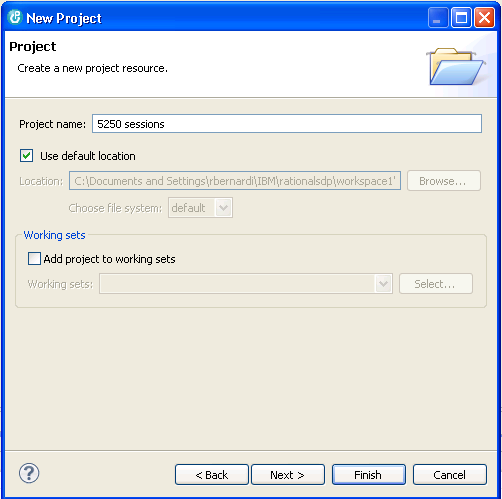
Figure 4: Name the project that will contain the Arcad 5250 Emulator.
In the Project Explorer view, you'll now find the project container you just created. You need to put a 5250 session into that container now. To do this, select File > New > Other, expand the ARCAD folder, and select 5250 Emulator Session as shown in Figure 5:
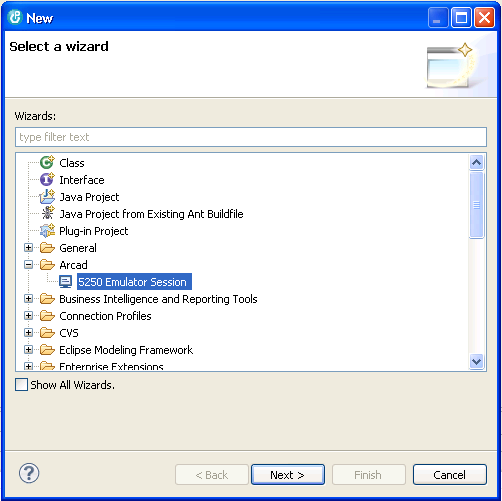
Figure 5: Create an Arcad 5250 Emulator session..
Click Next, and when prompted for a container, select the project you created earlier as seen here:
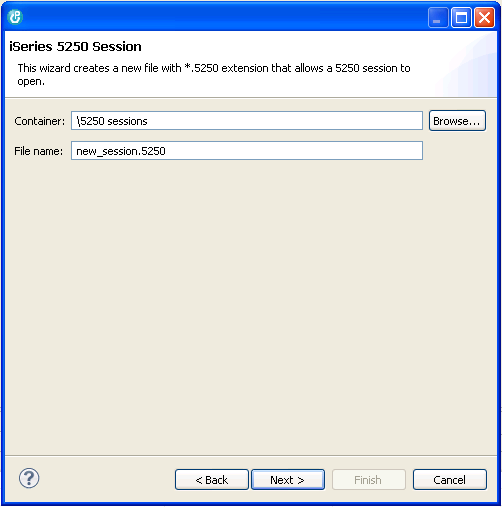
Figure 6: Specify the project to contain the Arcad 5250 Emulator session..
You need to name the host and select the screen size you would like to use:
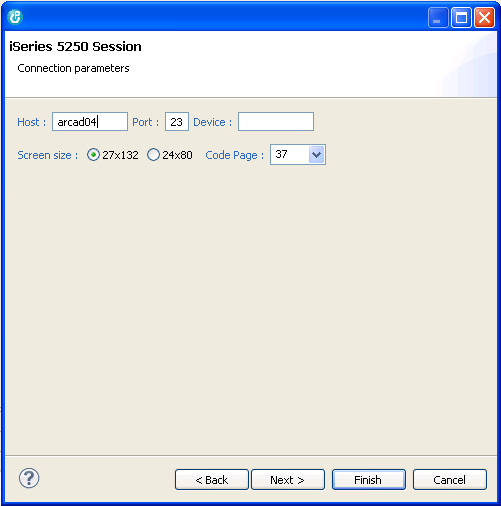
Figure 7: Name the host and select a screen size.
The wizard offers other selections you can review as well. When you click Finish, the emulator will appear:
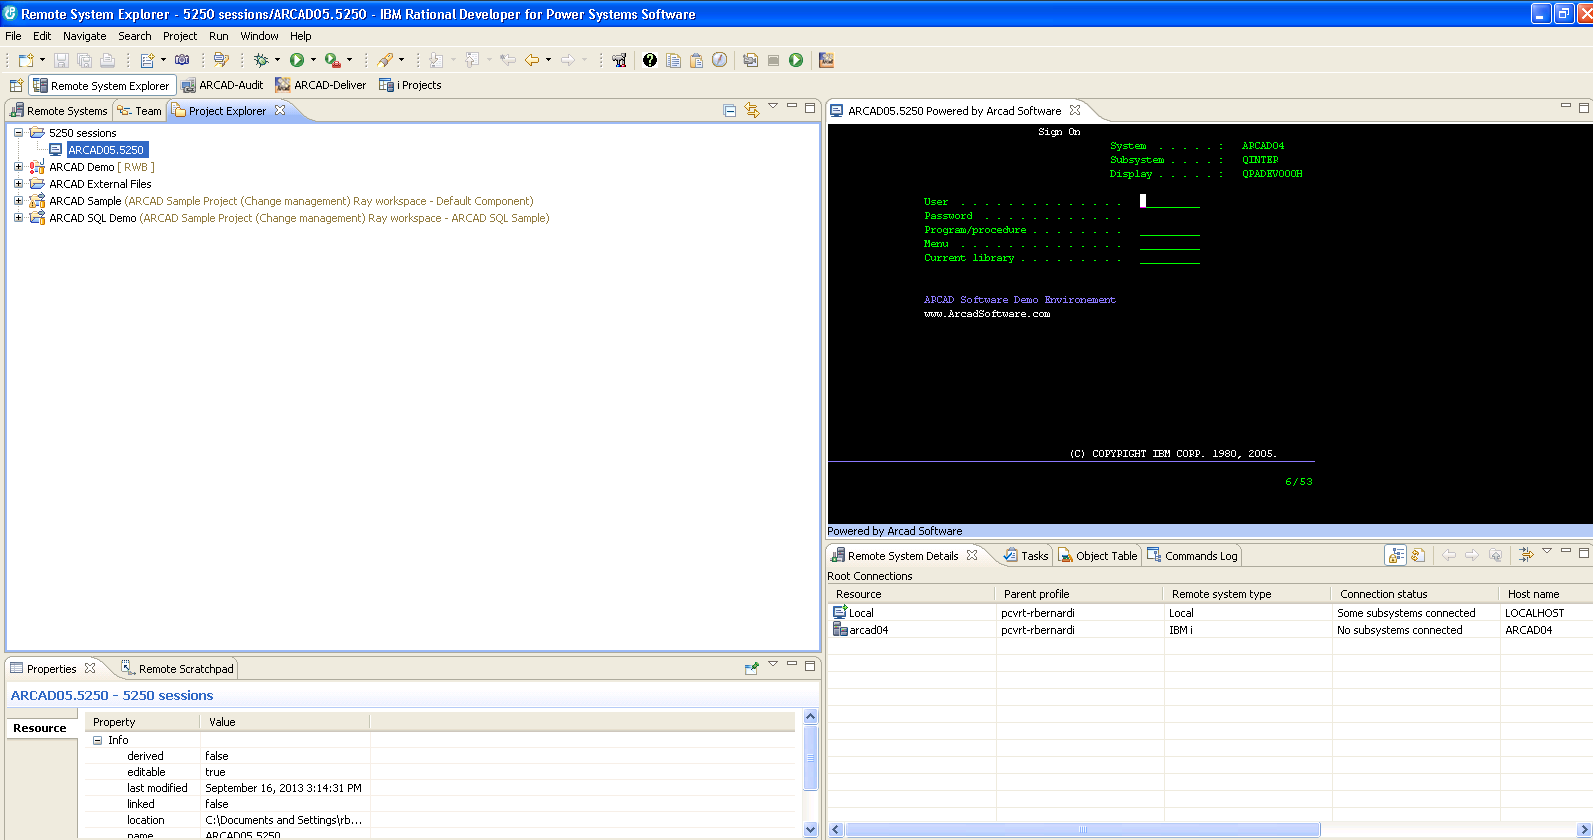
Figure 8: You now have your emulator!
It's really that easy to have an emulation session running with the Eclipse framework thanks to ARCAD software's emulator plug-in. You can configure any number of sessions to any number of iSeries machines and access them all without ever leaving the workbench. You can right-click any existing session and select properties to customize colors, fonts, or connection information, or go to Window > Preferences to alter the configuration for any new sessions.
If you're looking for a free, lightweight solution for 5250 emulation, this is one you won't want to pass up.


 Business users want new applications now. Market and regulatory pressures require faster application updates and delivery into production. Your IBM i developers may be approaching retirement, and you see no sure way to fill their positions with experienced developers. In addition, you may be caught between maintaining your existing applications and the uncertainty of moving to something new.
 IT managers hoping to find new IBM i talent are discovering that the pool of experienced RPG programmers and operators or administrators with intimate knowledge of the operating system and the applications that run on it is small. This begs the question: How will you manage the platform that supports such a big part of your business? This guide offers strategies and software suggestions to help you plan IT staffing and resources and smooth the transition after your AS/400 talent retires. Read on to learn:
LATEST COMMENTS
MC Press Online