There is no shortage of ways to move data from your AS/400 to Lotus Notes. Here’s one method that allows a Notes user to import AS/400 data into Notes fields from predefined SQL statements stored in a text file. All the user needs to do is choose the field that is to receive the data and select the text file that contains the predefined SQL query. In a few seconds, the field is populated with AS/400 data.
If you are using Lotus Notes in a network that includes the AS/400—whether the Notes server (Domino) is running on the AS/400 or another platform—you need to know about the DB2 for AS/400 Notes Import Program. This SQL-based query function is commonly referred to as the Client Import Library, which is the name I use for the remainder of this article. It is installed on and runs on a client system and requires the Notes client software; it won’t run from a browser interface. This Notes client add-in uses an SQL query—you store the query in a text file—that is run against DB2/400. The data returned from the query is automatically placed into a Notes field that the Notes user has the cursor positioned in. (That field must be a rich-text field.) You can download the Client Import Library for free from IBM’s AS/400 Web site (www.as400.ibm.com), although you are required to register before you can download it. You will need an ODBC driver to make a connection to the AS/400. (The Client Access ODBC driver is readily available to most programmers.)
I describe how to download, install, and use the free Client Import Library available from IBM; I have included a sample query to help you understand how the feature works. The sample I will present imports data into a Notes rich-text field from DB2/400.
Duty-fee Importing
The Client Import Library is actually a Notes database and includes a form that allows you to define a connection to your AS/400 via an ODBC data source name (DSN). Through this connection, you can transfer any AS/400 physical file into a Notes rich-text field. (A rich-text field is a special field that can contain formatted text and embedded objects such as documents and graphics files.)
The database file can be any AS/400 physical file, even flat files created without DDS, such as a file that contains a spool file copied to a database file using the Copy Spool File (CPYSPLF) command.
The Client Import Library is available from the IBM Web site. Just go to www.as400.ibm.com/notes and select Related Products. On the Related Products page, you’ll find a link (near the bottom of the Web page at the time of this writing) to the DB 2 fo r AS /400 Not es I mpor t Pr ogra m. Click on the link, and you’ll be presented with a description of the program. At the bottom of this page, you’ll find a link to the download site: service2.boulder.ibm.com/dl/db2notes/ db2notes-p. When you click on this link, you will be requested to register. (If you’re already registered, you can simply submit your user ID and password.) The registration process is pretty basic and won’t take that long to complete. Once you are registered, you can download a Windows 32-bit, Windows 16-bit, or OS/2 version of the Client Import Library compressed in a .zip format.
Once it is downloaded, the file will need to be decompressed (unzipped). You will wind up with five files: IEDB2.NSF, IEDB2ERR.DLL, NIEDB2.DLL, SAMPLE.QRY, and README.TXT. The Readme.txt file contains the installation instructions. Here is a summary of the installation process:
1. Copy the following two files to your Notes program directory (normally otes):
IEDB2ERR.DLL
xIEDB2.DLL (x is dependent on the platform, e.g, NIEDB2.DLL is for
Windows 32-bit computers)
2. Cop y fi le I EDB2 .NSF to your Not es d ata dire ctor y (n orma lly ot esd ata) on yo ur l ocal PC and add the data base to your Not es w orks pace . To do this , yo u wi ll ch oose Fil e, t hen Data base , an d th en O pen from the men u ba r, s elec t th e da taba se, and cl ick on t he A dd I con butt on t o ad d th e Im port DB2 dat a ic on t o yo ur w orks pace .
3. Ins ert an E DITI MP s tate ment in your not es.i ni f ile. The not es.i ni f ile is us uall y in the Wi ndow s di rect ory on a Win dows 95/ 98 s yste m. I f yo u do n’t find it th ere, sea rch for it f rom your roo t di rect ory. The sta teme nt s houl d ap pear aft er t he l ast ED ITIM P gr oup of s tate ment s an d sh ould loo k li ke t his:
EDITIMPxx=DB2 Query,0,_IEDB2,,.QRY,
The letters xx should be replaced by a sequential number incremented for each successive edit-level import library. Change the xx in EDITIMPxx to one more than that of the last EDITIMP reference. In my notes.ini file (illustrated in Figure 1), the xx is replaced by 34. You must restart Notes for the changes to the notes.ini file to take effect.
4. Install an ODBC driver (e.g., Client Access). If you’ve already installed Client Access, you probably have the ODBC driver in stal led. At the time of this wri ting , yo u ca n ob tain a f ree beta ver sion of the Client Access Express ODBC driver on the Web
(www.as400.ibm.com/clientaccess). You should find the ODBC driver manager in your Windows Control Panel.
5. Create a data source with the ODBC Data Source Administrator. If the physical file, like the one created with the CPYSPLF command, was created with no DDS, it is important to set the Translate CCSID parameter of the ODBC driver setup to the value
65535. This can be accomplished during the configuration of the data source by checking the Translate CCSID 65535 option on the Client Access ODBC setup panel. If you don’t want to be prompted for a user ID and password every time a query is run, specify a default user ID in the connection options section of the data source configuration. When you use this option, you must give your password the same value as your user ID. Of course, that’s not a good idea for tight security, so you want to be careful about using this option.
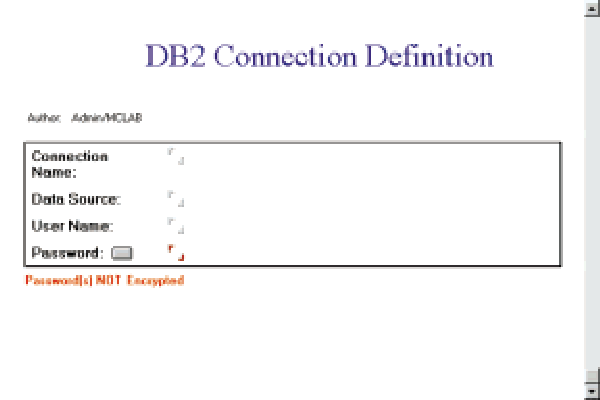
6. Define a DB2 connection for the import function in the IEDB2.NSF database. See Figure 2 for an illustration of the DB2 Connection Definition form. Enter a connection name, the data source you created in step 5, and an AS/400 user name and password.
A Query by Any Other Name
Yo u’re now rea dy t o de fine a q uery . Yo u de fine a q uery by ente ring sta teme nts in an ASCI I te xt f ile that res ides on the PC. The file nam e mu st h ave an e xten sion of
.q ry. Figu re 3 ill ustr ates a q uery I c reat ed f or t his arti cle. The que ry s elec ts a ll r ecor ds fr om t he Q CUST CDT file in libr ary QIWS . (I f yo u ha ve C lien t Ac cess , th is f ile shou ld re side on your AS/ 400. ) No tice tha t th ere are thre e de fini tion sta teme nts in t he de fini tion , ea ch b egin ning wit h th e ti lde (~) char acte r. T he f irst one def ines the lo cati on o f th e DB 2 im port dat abas e (I EDB2 .NSF ). T he s econ d on e de fine s th e na me of the con nect ion you crea ted in s tep 6. T he l ast stat emen t de fine s th e qu ery as a n SQ L st atem ent. The sta teme nts that beg in w ith the numb er ( #) c hara cter are com ment s an d ha ve n o im pact on the exec utio n of the que ry.
You can execute the query from any Notes rich-text field on a Notes form. To execute the query, perform the following tasks:
1. Select a Notes document and place it in edit mode. Position the cursor in a rich- text field and change the text properties to a monospaced font such as Courier. Using a monospaced font will allow the columns of your query to line up properly.
2. Sel ect the Impo rt o ptio n fr om t he N otes Fil e me nu a nd c hang e th e fi le t ype se lect ion to D B2 Q uery . Th is s elec tion opt ion come s fr om t he e ntry you pla ced in t he no tes. ini file in step 3 o f th e pr evio us s elec tion . Se lect the que ry d efin itio n fi le f or t he in form atio n yo u wa nt t o re trie ve. (I u sed the quer y il lust rate d in Fig ure 3.)
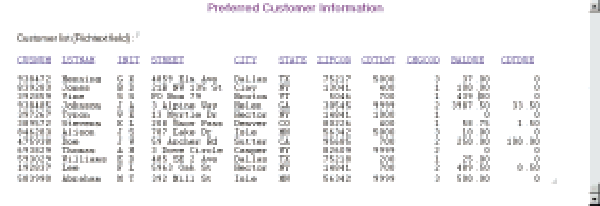
The results of the query are placed in the rich-text field as illustrated in Figure 4. Note that when I created the rich-text field, I set the font property to a monospaced font
(i.e., Courier) so the columnar data returned by SQL would line up. Since the attributes of a Notes rich-text field can be changed, I made the color of the heading blue.
All this may seem a little complicated, but remember that here, in addition to running the query, I installed the Client Import Library and database and created a query. Once the installation is done and your query is defined, you simply execute it on demand with the import function of Notes.
Limitations
Yo u sh ould be awar e th at t he C lien t Im port Lib rary has som e li mita tion s. A s it s na me i mpli es, it s uppo rts only a o ne-w ay d ata tran sfer . Th e Cl ient Imp ort Libr ary will no t wo rk w itho ut a n OD BC d rive r. T his mean s ev ery desk top syst em t hat uses it will re quir e an ODB C dr iver ins tall ed a nd c onfi gure d pr oper ly. The SQL quer ies to r etri eve da ta t hat need s to be set up a head of time wit h a text edi tor. Thi s re quir emen t, o f co urse , me ans that dyn amic que ries are n’t supp orte d. A lso, sin ce t he S QL q ueri es a re cr eate d w it h a te xt e di to r, y ou d on ’t h av e an y SQ L sy nt ax c he ck in g ab il iti es, nor ca n da taba se v alid atio ns, such as chec king tab le a nd c olum n na mes, occ ur.
Because the AS/400 data is placed in a Notes rich-text field, you can’t manipulate the data as you could if it were in a regular text field. For example, if you wanted to programmatically use the data you placed in your Notes document, you couldn’t read it directly from a rich-text field. You can use the Notes formula language to convert a rich- text field to plain text, but this may introduce too many complications and defeat the purpose of easily accessing AS/400 data.
Add Another Tool to the Toolbox
Lotus Notes has some powerful built-in data exchange features, including LS:DO, which was described in “DB2/400 via Lotus Notes: Free Delivery” (MC, May 1999), and the @DB commands, described in the accompanying sidebar. The Client Import Library, although not a native AS/400 function, is one more data import feature you should consider using to help you integrate your AS/400 data with Notes.
Another Easy Import Option: The Notes Formula Language
Notes uses a formula language that allows you to perform some very useful functions with some simple macro type statements. These simple statements are comprised of expressions built with what are known as @functions and @commands (they all begin with the @ character). Some examples of the @functions are @Text, @If, @Date, and @Day.
Before LotusScript (modeled after the infamous Visual Basic) came along, the Notes formula language was the only way to program Notes. One disadvantage of the formula language is that it has no program flow control. It’s great for fairly simple tasks such as handling events on forms, but once you need to do something that requires any amount of logic, you’ll hit the wall with the Notes formula language. For importing purposes, however, the Notes formula language limitations will not pose any problems.
There are three special @functions that allow you to access information in Notes databases: @DbLookup, @DbColumn, and @DbCommand. When these @functions are used with ODBC, they can access data from DB2/400 or any ODBC-compliant database.
The @DbLookup function returns a single column of a row that matches a key value that you supply. The @DbColumn function returns an entire column of values for the table column you specify. The @DbCommand function passes an SQL statement to the external database and returns the result.
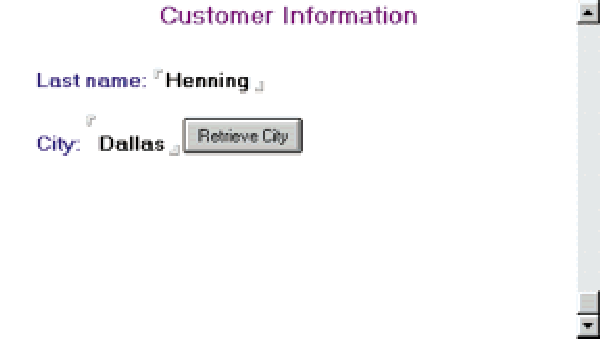
I will give only a sample of the use of the @DbLookup function. You must have completed steps 4 through 6 shown in the “Duty-free Importing” section of the accompanying article before this sample will work. Figure A shows a simple Notes customer information form. If you enter a customer name and click on the Retrieve City button, Notes retrieves the city from a DB2/400 file (in this case, the QCUSTCDT file). The city value of Dallas in Figure 1 was retrieved from an AS/400. The @DbLookup function is linked to the Retrieve City button.
Figure B contains the @DbLookup function I used to look up and retrieve the data, minus my AS/400 system name, user ID, and password. You can pass null strings for the user ID and password to reduce security concerns by specifying the value of “” (null string) for each parameter. You’ll then be prompted for the user ID and password unless you have specified a default user ID in your ODBC data source.
I’ll explain the parameters that relate to the data retrieved and the selection criteria. Following the password parameter is the name of the library and file, the column I want the function to return (CITY), the column I want to compare the key (LSTNAM) against, and the key value (LName) that is supplied by the Notes form.
You probably won’t want to use the @Dblookup command except where you need only a few values. You can actually think of the @DbLookup function as an RPG CHAIN operation since it retrieves a single record by a key value. If you need more than a single item or single column of data (which the @DbColumn or @DbCommand function will return), you’ll want to consider another alternative.
 |
 |
 |
 |
 |
Figure 3: This query definition file selects all records from the QCUSTCDT file in library QIWS.
Figure 4: A Notes rich-text field allows you to specify properties that will make your query results display correctly.
 |


 Business users want new applications now. Market and regulatory pressures require faster application updates and delivery into production. Your IBM i developers may be approaching retirement, and you see no sure way to fill their positions with experienced developers. In addition, you may be caught between maintaining your existing applications and the uncertainty of moving to something new.
 IT managers hoping to find new IBM i talent are discovering that the pool of experienced RPG programmers and operators or administrators with intimate knowledge of the operating system and the applications that run on it is small. This begs the question: How will you manage the platform that supports such a big part of your business? This guide offers strategies and software suggestions to help you plan IT staffing and resources and smooth the transition after your AS/400 talent retires. Read on to learn:
LATEST COMMENTS
MC Press Online