Snippets are the big brother to templates, with a little more functionality for a little more work.
In a previous article, I introduced you to templates, an easy way to create simple macros that you can use to populate your code. Templates are fun and easy to use, but you'll run up against their limitations pretty quickly. The fact that the code is inserted as is from the template means that in many circumstances you'll need to modify the code as soon as you enter it. That's where snippets can help: this article will show you how.
A Little Bit of Setup
Snippets are accessed using the RDi Snippets view, which isn't visible by default. You'll have to make it visible. It's easy: simply select Window > Show View > Other from the main menu, and then type "sn" in the search value as shown in Figure 1. Click on the Snippets view, and it will appear.
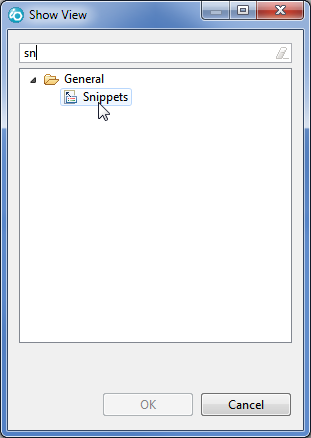
Figure 1: Use Window > Show View > Other to make the Snippets view visible.
Where it appears depends on how your RDi perspective is configured. You may have to move it to make it more usable. I usually move it to a spot on my screen where it's tall and narrow (think of portrait vs. landscape orientation); that's the most practical shape for it. As I use snippets more and more, I have updated my standard iEdit perspective to include the Snippets view in the same stack as the Outline and Remote Systems views, both of which work well tall and narrow. If you don't have your own perspective, I'll outline how to make one in another article. Anyway, after making it visible and moving it, it will look like Figure 2.
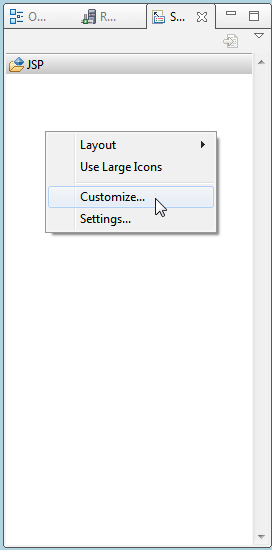
Figure 2: Snippets work best in a tall and narrow window.
Snippets are grouped into categories that are shown in a palette (palette categories open and close when you click on them; you may be familiar with the widget term "accordion" as well). Depending on what you have installed, you may see some predefined lists. For example, in my configuration, I see a category named JSP. You'll want to create at least one category of your own. As you create more snippets, you may find it easier to group them into separate categories, but for now let's just create a single holder. Right-click in the view and select Customize… as shown. You'll get a dialog box as shown in Figure 3.
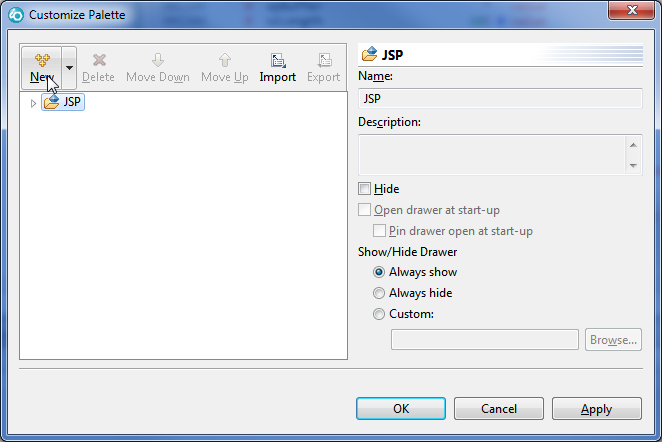
Figure 3: The Customize Palette dialog lets you add, change, and delete categories and snippets.
Click on the New button as shown in Figure 3 and then select New Category from the resulting drop-down. This will create a category named "Unnamed Category," which you can then customize. Figure 4 shows how I did that in my workspace.
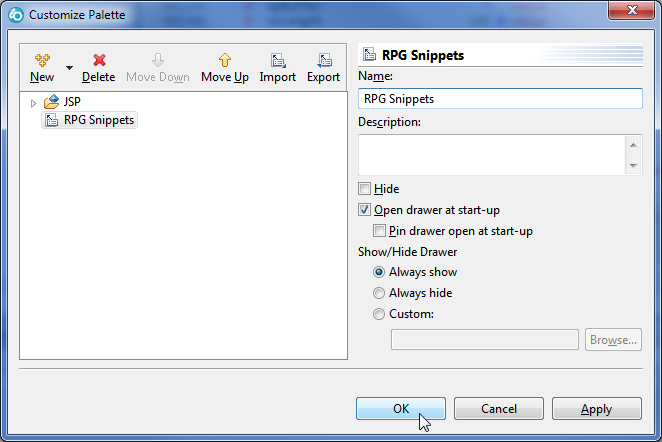
Figure 4: For my workspace, I created a category named RPG Snippets.
The dialog has several options, many of which can be very useful. The Custom option of Show/Hide Drawer allows you to select a set of source types for which this category will be visible. That can come in handy when you're using snippets for many different environments (such as web development and server-side business logic). But for now just leave all the defaults. All you have to do is type in the Name field and hit OK as shown. And now you're ready to add new snippets!
Creating a Snippet
Creating a new snippet is very easy. First, find a chunk of code you want to "snippet-ize." Let me show you one of my favorites: a SETLL/READE loop. I have standardized on this construction for some time now. It might be fun to debate the pros and cons of this approach, but the beauty of snippets is that you don't have to use my code; you make snippets of your particular programming best practices. But let's use mine for now.
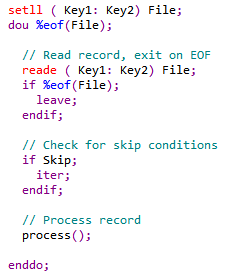
Figure 5: This is my standard SETLL/READE loop with conditional skipping.
My loop is simple: SETLL outside the loop, with a READE inside the loop using %EOF to exit. Note that the code in Figure 5 is clearly dummy code: my field is named File, and my keys are named Key1 and Key2. But the following technique could work just as well with live code. All you have to do is mark the code, copy it in the editor, right-click on your new category, and select Paste as Snippet.
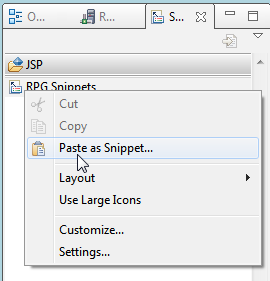
Figure 6.:This is how you add code copied from your program as a snippet.
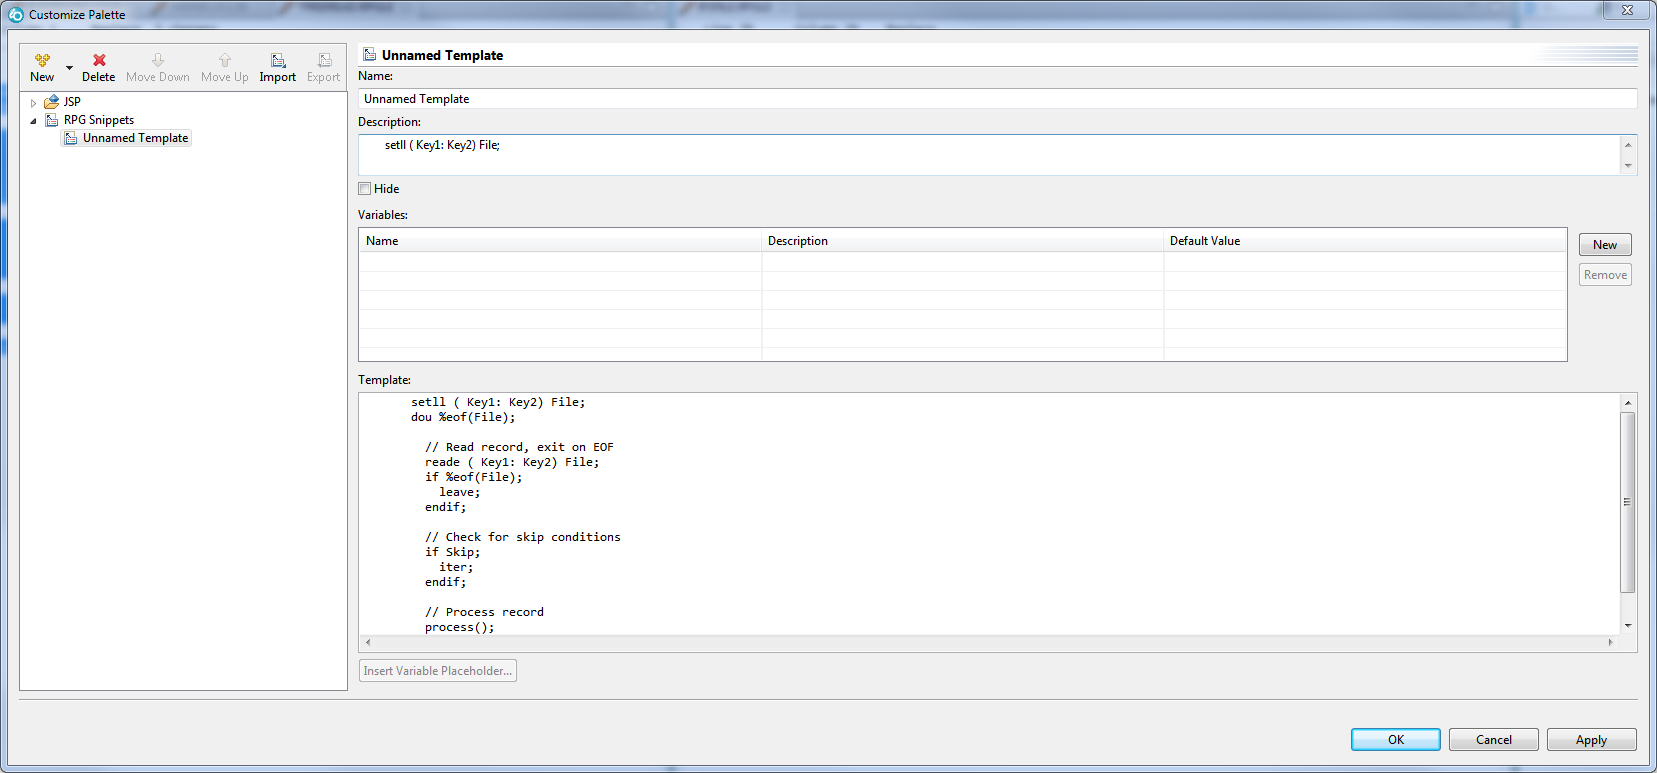
Figure 7: The wizard to add a snippet is large but easy to use.
Figure 6 is the right-click and paste, while Figure 7 shows the resulting dialog. That dialog is rather large and unwieldy, but it's pretty easy to use. First, change the name and description. Then, add variables for each part of the code that changes at entry time. In this case, I need to change two things: the file name and the key list. To do that, I hit the New button and add an entry for each substituted field. Once that's done, go in and change the snippet, replacing the code that changes with a variable designator. You can use the Insert Variable Placeholder button to do it, or just type in the values yourself using the syntax ${Variable}. Figure 8 shows the results after I'm done.
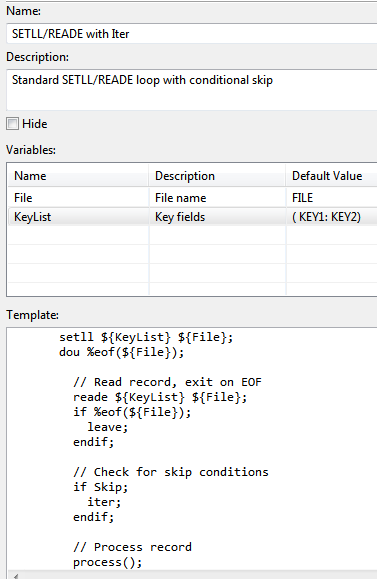
Figure 8: I've added variables and changed the code to use them.
Once you've done that, using the snippet is quite simple. All you do is place your cursor in your program at the appropriate line and then double-click the appropriate snippet. Up will come the Insert Template dialog, which allows you to enter the appropriate values for the snippet.
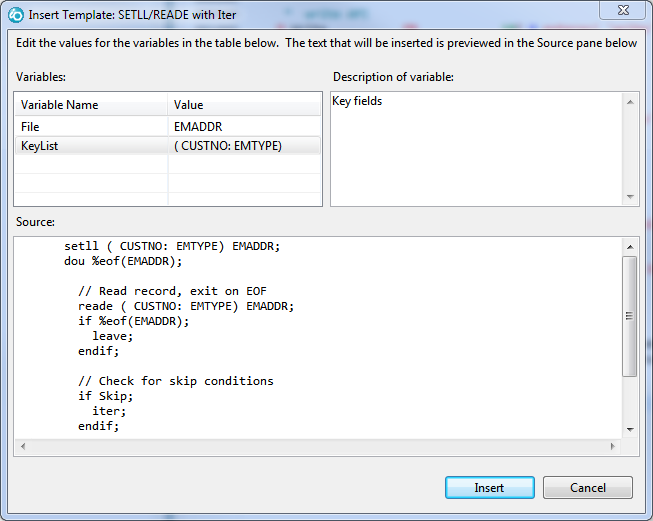
Figure 9: Insert the snippet using the Insert Template dialog.
What I especially like about the dialog in Figure 9 is that as you enter the values for the substitution variables, the dialog updates the code to show you what the inserted code will look like. That can help you remember what it is your code is supposed to look like. Also remember to put initial values into your variables (back in Figure 8); these will help you to remember how to key in the substitution values.
Once you're done, you just hit Insert and the code will be added to your program as shown in Figure 10!
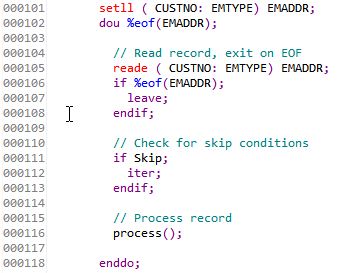
Figure 10: The fully substituted snippet is inserted into your program.
It's not perfect. Snippets aren't very smart about indentation. You select the most common indentation for the template and then move it left and right as necessary after you've inserted it. But hey, that's why we have the LL and RR block commands in the LPEX editor! Despite snippets' shortcomings, hopefully this article will help you write snippets that will make you more productive. Even better, if you create common snippets with standard code, you can share them among your team to promote consistency in coding. What a concept!


 Business users want new applications now. Market and regulatory pressures require faster application updates and delivery into production. Your IBM i developers may be approaching retirement, and you see no sure way to fill their positions with experienced developers. In addition, you may be caught between maintaining your existing applications and the uncertainty of moving to something new.
 IT managers hoping to find new IBM i talent are discovering that the pool of experienced RPG programmers and operators or administrators with intimate knowledge of the operating system and the applications that run on it is small. This begs the question: How will you manage the platform that supports such a big part of your business? This guide offers strategies and software suggestions to help you plan IT staffing and resources and smooth the transition after your AS/400 talent retires. Read on to learn:
LATEST COMMENTS
MC Press Online