With over 5 million downloads of Wireshark every year, network analysts who have skills in packet analysis set themselves apart. To troubleshoot your network, you should learn, really learn about Wireshark.
Packet analysis can analyze network problems, detect network intrusion attempts, perform content monitoring, monitor bandwidth usage per application and process, and verify endpoint security status to see unwanted protocols (such as bogus ARP traffic and Multicast DNS), and gather and report network statistics.
As data flows across the network, a packer analyzer captures each packet, decodes the packet's raw bits, and then displays the field values in the packet according the appropriate RFC or other specification. Network administrators should be familiar with packet analysis, as Wireshark is built into the Cisco Nexus 7000 series and many other devices.
Wireshark, Formerly Ethereal, an Open-Source Packet Analyzer
In the late 1990s, Gerald Combs needed a tool for analyzing network problems. Portable sniffers were available at the time, but they were costly. Combs developed Ethereal with the help of some friends, and this later became Wireshark. It has been around for over 15 years.
In addition to Wireshark, there are other packet analyzers. Cain and Abel can recover passwords by sniffing the network and can record Voice over IP (VoIP) conversations. Tcpdump is a protocol analyzer that runs from the command line. And NarusInsight, formerly Carnivore, can monitor all Internet traffic.
Download and Install
If you have never used Wireshark, go to Wireshark.org. The home page has resources where you can download Wireshark, learn about it, and then enhance your capture abilities with some of the add-ons and interfaces. Select download, which will automatically identify the operating system that is most likely yours. Select that and bring down the executable.
Note: When installing Wireshark on a MAC, you will need to use XQuartz, which is used with some MAC operating systems so that applications such as Wireshark with run with an appropriate GUI.
This is a pretty standard installation. It will take you into the License Agreement, which is a little different because it's the GNU public licensing, and it might be of interest to read it. Next comes a choice of components of Wireshark you want to install. With that, you can see that a number of components are available for installation. I don't generally cherry pick through these, as most of them are needed in order for Wireshark to function correctly.
The default directory is presented where it will be installed, or you can specify another one. At this point you're going to see a window pop up asking, "Install WinPCap?" If you're using Windows, you will need to install WinPCap, as it's one of three capture engines: WinPCap for Windows, LibPcap for Linux, and AirPcap for Wireless.
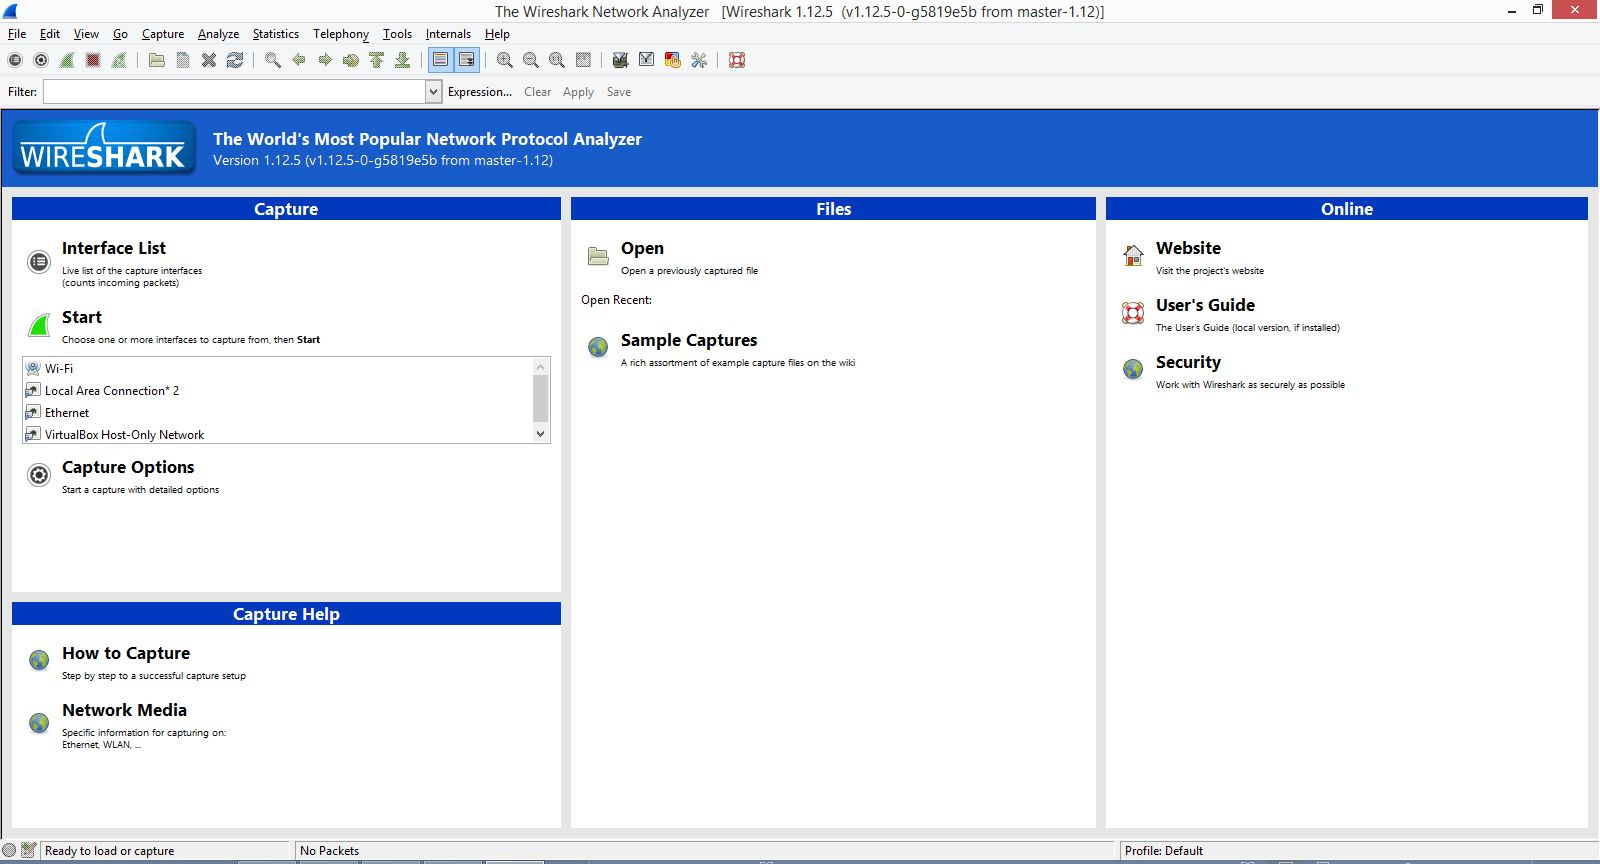
Once the installation is complete you can run Wireshark. Look at the splash screen to get a little more familiar with Wireshark. See Figure 1.
Figure 1: This is the Wireshark Splash Screen.
On the top, you'll see the menu choices, such as File, Edit, View, Capture, Analyze, Statistics, Tools, and Help. You also see commonly referenced icons, some of which are greyed out simply because there are no packet captures to reference. You'll see the display filter, and then down below you'll see three columns.
Ready to Capture
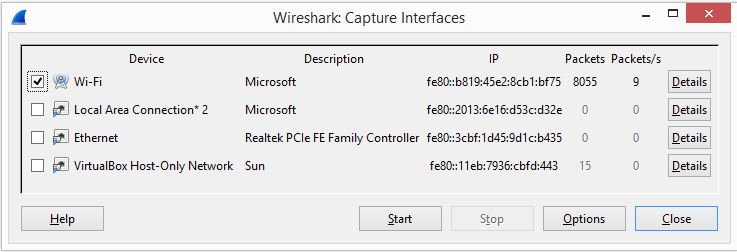
Select the drop-down menu Capture and select Interfaces, where you'll see a list of interfaces that are available (the Start button remains grayed out until you select one of the interfaces). The one that is actively exchanging packets is the one to select. See Figure 2.
Figure 2: Choose your interface here.
Click Start and your capture will begin. Stop the capture after a few seconds by selecting the red square next to the green fin, as Wireshark can start to consume your resources unless you use a ring buffer.
When you look at your first capture, you'll see three panes:
- Packet List shows all packets that are captured.
- Packet Details shows the details of one single packet.
- Packet Bytes is like a HEX dump that displays the current packet's contents.
The Packet Bytes pane doesn't help in analysis, so I generally remove this by going to View, and unselecting Packet Bytes, which will give you more room on your screen.
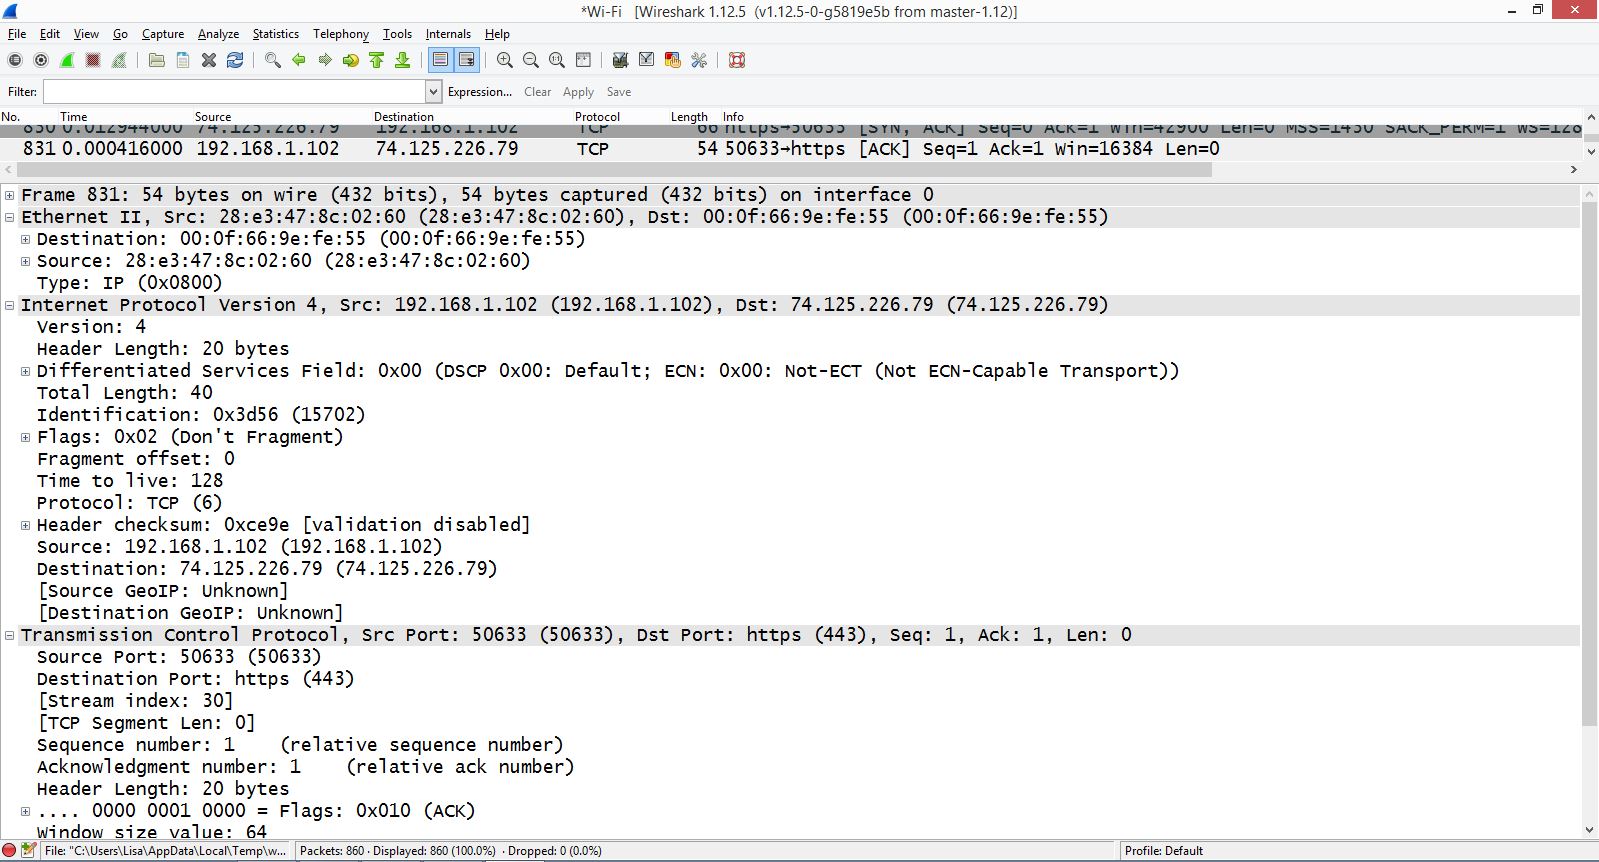
If this is your first time looking at Wireshark, select and look at one single frame at a time, and focus on the packet details pane. Here I have selected packet 831 and expanded the headers. See Figure 3.
Figure 3: Look at the details of a single packet.
Curious? Join me next month, as my TechTip will investigate a single TCP packet in Wireshark.


 Business users want new applications now. Market and regulatory pressures require faster application updates and delivery into production. Your IBM i developers may be approaching retirement, and you see no sure way to fill their positions with experienced developers. In addition, you may be caught between maintaining your existing applications and the uncertainty of moving to something new.
 IT managers hoping to find new IBM i talent are discovering that the pool of experienced RPG programmers and operators or administrators with intimate knowledge of the operating system and the applications that run on it is small. This begs the question: How will you manage the platform that supports such a big part of your business? This guide offers strategies and software suggestions to help you plan IT staffing and resources and smooth the transition after your AS/400 talent retires. Read on to learn:
LATEST COMMENTS
MC Press Online