IBM Data Studio provides a web console to create, schedule, and manage database jobs.
Editor's note: This article is an excerpt from Chapter 2, "DB2 Server Management," of DB2 10.1/10.5 for Linux, UNIX, and Windows Database Administration: Certification Study Guide (MC Press, 2015) by Mohankumar Saraswatipura, Robert (Kent) Collins, and Roger E. Sanders.
IBM Data Studio gives application developers and database administrators a single integrated environment for creating, deploying, debugging, and administering data-centric applications on IBM DB2 for Linux, UNIX, and Windows (LUW). The product consists of two components:
- The IBM Data Studio client, which is an Eclipse-centric tool that provides an integrated development environment for database and instance administration, routine and Java application development, and query-tuning tasks
- The IBM Data Studio web console, which is a web-based tool with health and availability monitoring, job creation, and database administration tasks
Using IBM Data Studio and the IBM Data Studio web console, you can perform various tasks, including connecting to instances and databases, generating DDL scripts, performing database administration tasks and database development tasks, scheduling database jobs, and analyzing SQL queries. In this article, we examine database job scheduling with IBM Data Studio.
Scheduling Database Jobs
IBM Data Studio provides a web console to create, schedule, and manage database jobs. You can launch the IBM Data Studio web console (by default, http://localhost:11086/console) from Start > All Programs > IBM Data Studio > IBM Data Studio 4.1.0.0 Web Console > Web Console, as in Figure 1.
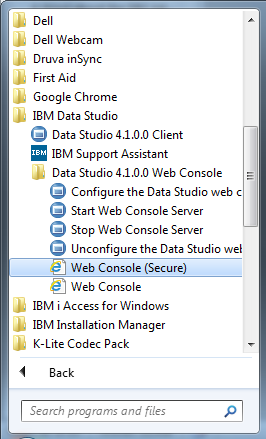
Figure 1: Launch the IBM Data Studio web console.
When you launch the web console, it will take you to the Task Launcher tab and an Open option to activate the Job Manager, multiple health monitoring and alerting utilities, and security management, as Figure 2 shows.
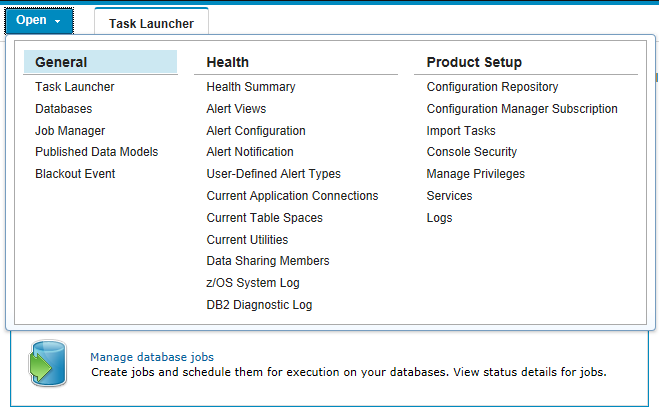
Figure 2: This screen shot shows the IBM Data Studio web console Open options.
A close look at the Job Manager is necessary to understand the job scheduling capabilities within the IBM Data Studio web console. You can perform the following listed actions in the Job Manager:
- Add, edit, run, and delete jobs from the Job List tab
- Add, edit, and delete schedules, and create job chains from the Schedules tab
- Add, edit, and delete notifications from the Notifications tab
- Edit the job history setting, view, cancel, run (rerun the earlier executed job), and delete a specific job history from the History tab
You need to create a database connection before scheduling or managing any jobs in the IBM Data Studio web console. To create a connection, select Databases in the General section of the Open menu, and then click "Add a database connection" (see Figure 3). Once you have created the required database connections, you can start scheduling the jobs over them by using the IBM Data Studio web console job manager.
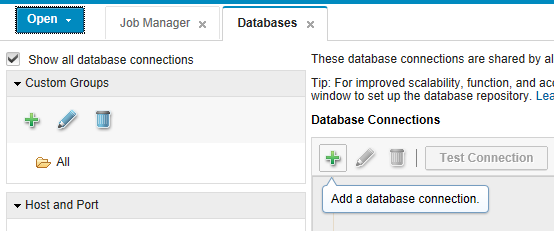
Figure 3: Add a new database connection.
Creating and Scheduling Jobs
To create a job, open the Job List tab in the Job Manager section, and click Add Job. On the resulting screen (see Figure 4), enter the job information, such as name, type (DB2 CLP Script, SQL Only Script, or Executable/Shell Script), job description, and whether to enable scheduling.
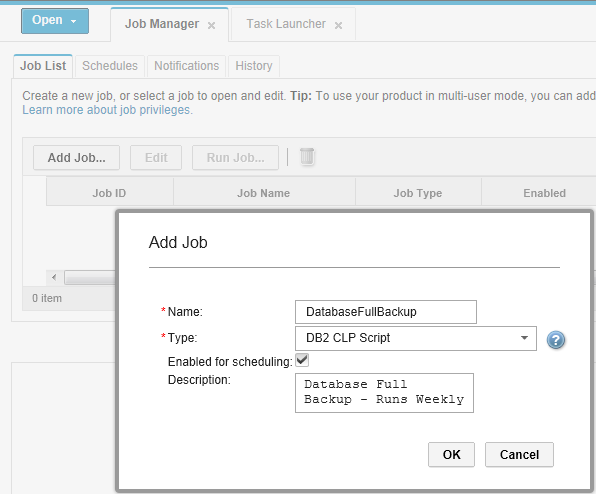
Figure 4: Add a new job in the Job List.
You can update the job properties, script, schedules (add or use the existing schedule), chain, and notification list in the Job Components section, as Figure 5 shows.

Figure 5: Add script into the job in the Job List.
You have the flexibility to add a schedule to an existing job chain. However, you can use the Schedule tab to do this as well (see Figure 6). On the Schedules tab, click Add Schedule and choose the job to schedule from the list.
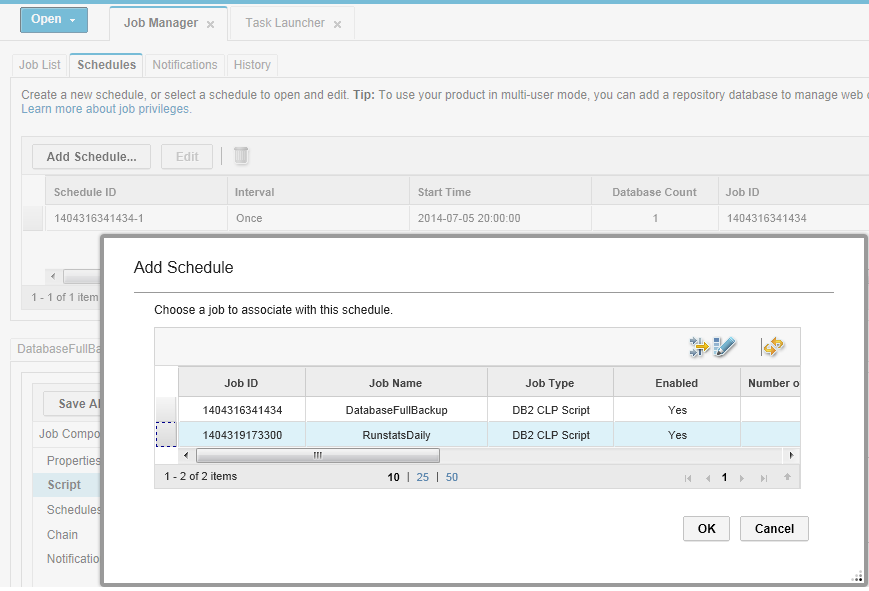
Figure 6: Add a schedule.
In the Schedule Details section, you can specify the initial date, initial time, repetition (Monthly, Weekly, EveryDay, DailyInterval, Hourly, EveryMinute), and how long to keep this job running. Within the Databases section, you have the option to choose the databases on which to run the job. And finally, with Timeout Settings, you can specify an action (such as canceling the job) to be performed if the script execution duration exceeds a timeout period, as in Figure 7.

Figure 7: Schedule parameters.
Scheduling Jobs in a Job Chain
A job chain executes one or more jobs (up to three) in sequence. The primary job initiates the job execution within the job chain and is followed by a dependent job and a closing job, as Figure 8 illustrates.
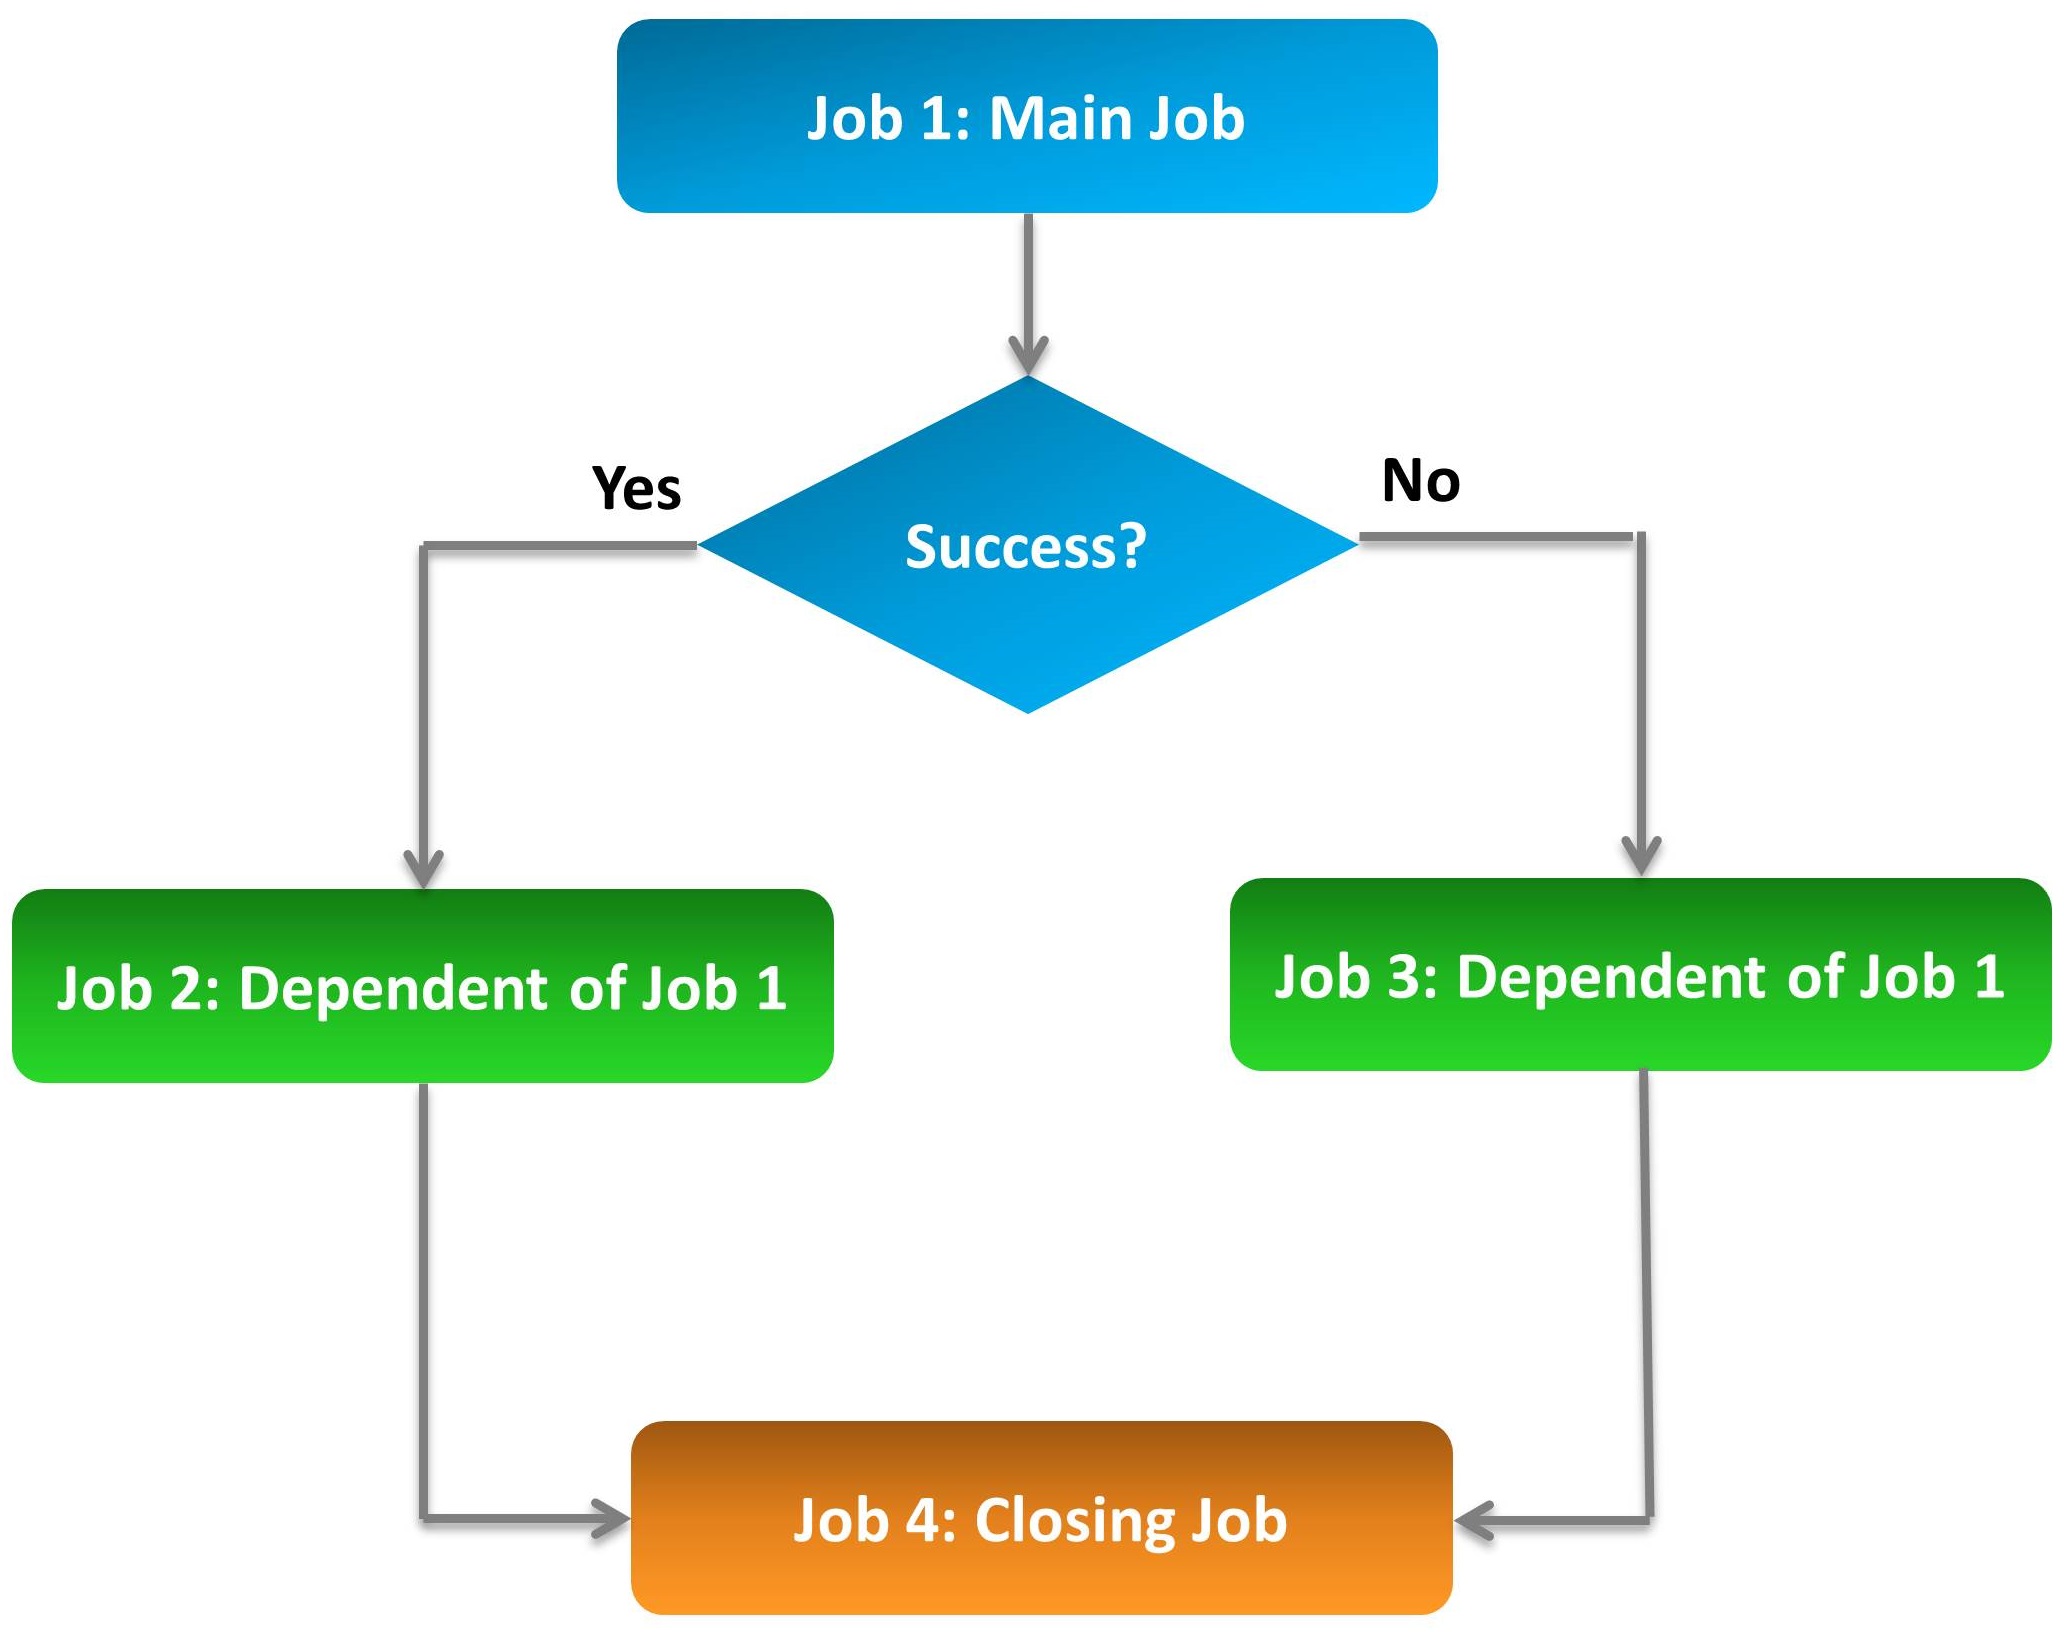
Figure 8: Job chains in Schedule Jobs.
To create a job chain, navigate to Schedules in the Job Manager, and click Add Schedule. This activates the Add Schedule window, wherein you can highlight the primary job and click OK, as Figure 9 shows. The Job Manager has four jobs with the following characteristics ready to go into a job chain:
1. RunstatsDaily (Job ID: 1404319173300—main job)
2. REORGDaily (Job ID: 1404334014453—dependent job)
3. DB2LookDaily (Job ID: 1404334590445—dependent job)
4. DatabaseFullBackup (Job ID: 1404316341434—closing job)
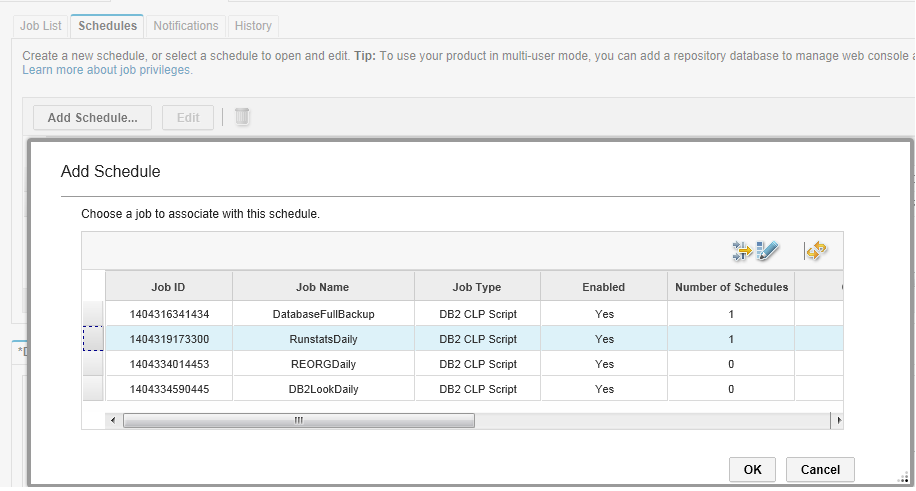
Figure 9: Job chain creation step 1—choose the main job.
As the figure shows, you highlight the RunstatsDaily job in the Add Schedule window, and click OK. Doing so will then display the Job Component properties page, where you can select Chain and key in dependent and closing job details (see Figure 10).
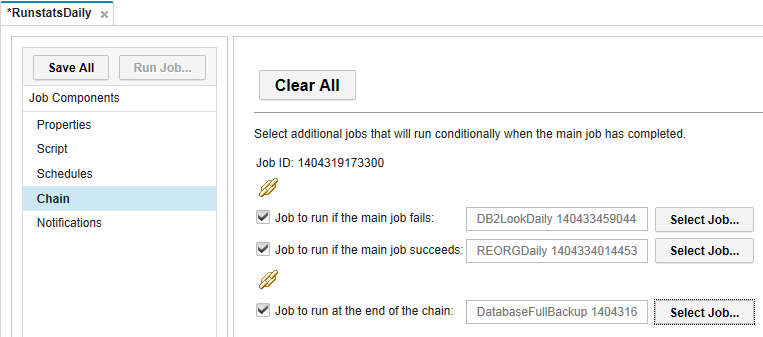
Figure 10: Job chain creation step 2—choosing the dependents.
In this example, RunstatsDaily is the parent job; when it finishes successfully, it triggers the REORGDaily job or the DB2LookDaily job. However, DatabaseFullBackup is the closing job, so no success or failure condition is associated to it.
Once you schedule the job chain, you can check the status of the schedule and the type in the Schedules tab. Figure 11 shows that the recently scheduled job is a job chain, not just a job.

Figure 11: Job schedule status and the job chain flag.
Setting Up Job Notifications
You can configure email notifications to be sent to one or more users depending on a success, failure, or warning status of the job. You can also choose to send a notification irrespective of the job execution status. To activate the notification, navigate to Notifications tab in the Job Manager, and key in the email recipients and the notification criteria (see Figure 12).

Figure 12: Job notification with criteria.
Viewing the Job History
After the job is scheduled, you can open the History tab to view the job execution status through a progress bar, and see the complete job log by clicking View Log in browser. You can configure the job history retention period in the Job History Settings. Even though you scheduled the job chain, you will see job logs for each job instead of a consolidated job history log, as Figure 13 shows.
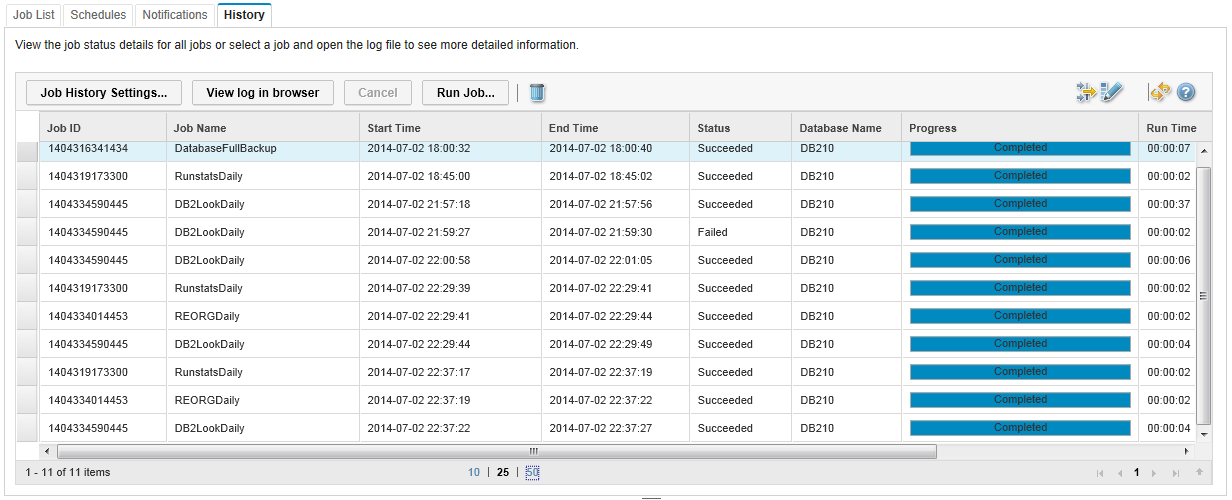
Figure 13: Job history with the progress bar.
About the Authors
Mohankumar Saraswatipura works as a database solutions architect consultant with Hewlett-Packard Company, focusing on IBM DB2 and Vertica big data solutions. He is an IBM Champion (2010–2015) and a DB2's Got Talent 2013 winner. He is an IBM Certified DB2 Advanced Database Administrator, DB2 Application Developer, and DB2 Problem Determination Master.
Roger E. Sanders is president of Roger Sanders Enterprises, Inc. He is an IBM Champion (2008–2015), an IBM developerWorks Master Author Level 2, and the author of 22 books on DB2.


 Business users want new applications now. Market and regulatory pressures require faster application updates and delivery into production. Your IBM i developers may be approaching retirement, and you see no sure way to fill their positions with experienced developers. In addition, you may be caught between maintaining your existing applications and the uncertainty of moving to something new.
 IT managers hoping to find new IBM i talent are discovering that the pool of experienced RPG programmers and operators or administrators with intimate knowledge of the operating system and the applications that run on it is small. This begs the question: How will you manage the platform that supports such a big part of your business? This guide offers strategies and software suggestions to help you plan IT staffing and resources and smooth the transition after your AS/400 talent retires. Read on to learn:
LATEST COMMENTS
MC Press Online